How to install Android Studio in Windows 10?
Windows requirements:
- Microsoft Windows 7/8/10 (32-bit or 64-bit)
- 3 GB RAM minimum, 8 GB RAM recommended (plus 1 GB for the Android Emulator)
- 2 GB of available disk space minimum, 4 GB recommended (500 MB for IDE plus 1.5 GB for Android SDK and emulator system image)
- 1280 x 800 minimum screen resolution

You can also select Android Distribution package manually by clicking "DOWNLOAD OPTIONS" button.
 |
| Distribution Package List |
I have downloaded directly clicking on "DOWNLOAD ANDROID STUDIO" button.
Read the terms and conditions and accept it by clicking on checkbox. Then download button gets enable.
 |
| Terms & Condition for Downloading Android Studio |
Click on "DOWNLOAD ANDROID STUDIO FOR WINDOWS" button.
Installing Android Studio on 64-bit Windows 10
I launched android-studio-ide-192.6392135-windows.exe to start the installation process. The installer responded by presenting the Android Studio Setup dialog box shown in Figure 1.
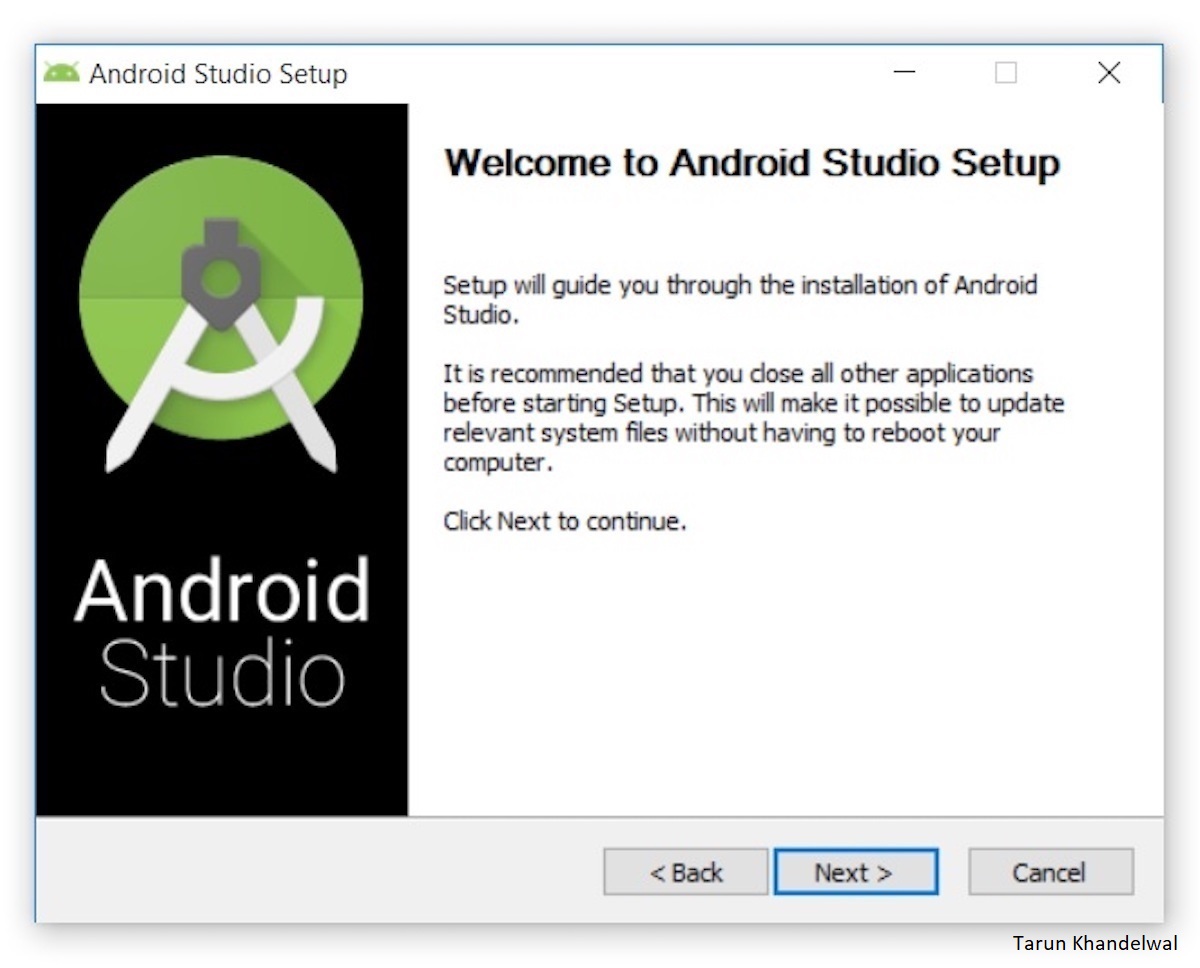 |
| Figure 1. Set up Android Studio |
Click Next, following panel will appear, which provides option to decline installation of Android Virtual Device (AVD).
 |
| Figure 2. Install an Android AVD? |
I chose to keep the default settings. After clicking Next, the Configuration Settings panel appears, which asks where to install Android Studio.
 | |
|
I kept default installation location, and clicked Next and panel asks for creating shortcut on Start Menu.
 |
| Figure 4. Choose Start Menu Folder |
I kept default settings and clicked on Install. The following installing panel appears.
Clicking on Show Details causes the names of files being installed and another activities to be displayed.
 | |
|
When installation finished, the Installation Complete panel appears.
 |
| Figure 6. Install Complete Panel |
After clicking Next, the installer presents the Completing Android Studio Setup panel.
 | |
|
To complete the installation, I left the Start Android Studio checkbox checked, and click on Finish.
Click to check: How to configure Android Studio after installation